Difference between revisions of "Oxford Helium Cryostat"
(corrected python link) |
|||
| (17 intermediate revisions by the same user not shown) | |||
| Line 1: | Line 1: | ||
== About == | == About == | ||
11-BM supports a Oxford closed flow Helium cryostat. The sample is in direct contact with the cold He exchange gas. This can be used to cool small diameter capillary samples from ambient temperatures down to ~ 10 K with an in-situ spinner (or 5 K with no spinning) | 11-BM supports a Oxford closed flow Helium cryostat. The sample is in direct contact with the cold He exchange gas. This can be used to cool small diameter capillary samples from ambient temperatures down to ~ 10 K with an in-situ spinner (or 5 K with no spinning) | ||
| Line 17: | Line 17: | ||
* At the command line - navigate to your current User GUP directory | * At the command line - navigate to your current User GUP directory | ||
(example: cd ~Users/GUP25248) | (example: cd ~Users/GUP25248) | ||
* At the command line, type " | * At the command line, type "EPDpython CStemplog.py" to start the log scrip | ||
| Line 111: | Line 111: | ||
== CuFeO2 example== | |||
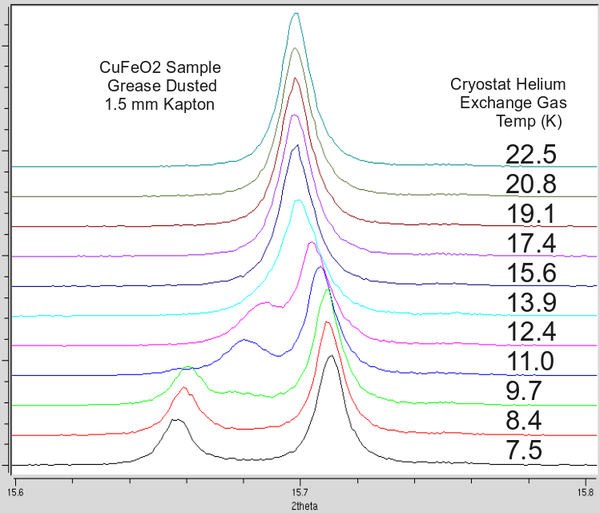
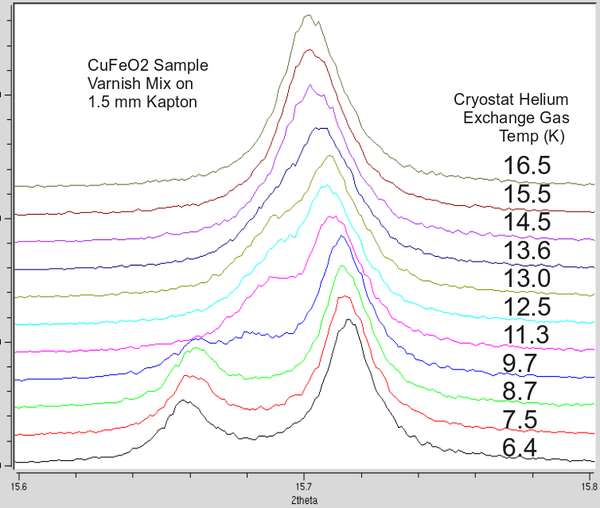
CuFeO2 is used at 11-BM as a low temperature "standard". This CuFeO2 sample has been examined by several beamlines (powder and single crystal) to established a clear and abrupt transition at ~ 12 K. Details are below. If you prepare this powder in the same manor as your new cryostat sample you should be able to observe the transition. If not, it may be a sign of poor heat transfer between your sealed capillary and the exchange gas - or a sign of significant beam heating. Of course - each sample is unique, but we have found this to be a useful check. | |||
[ | Phys. Rev. B 73, 220404(R) (2006) [4 pages] http://prb.aps.org/abstract/PRB/v73/i22/e220404 | ||
[[Image:CS_CuFeO2paper.png|frameless|600px| CuFeO2 paper]] | |||
'''11-BM data; reported temp is the exchange gas temperature as measured by sensor #1 at the end of the sample stick. | |||
''' | |||
[[Image:CS_CuFeO2data_Grease.png|frameless|600px| CuFeO2 Grease]] | |||
[[Image:CS_CuFeO2data_Varnish.png|frameless|600px| CuFeO2 Varnish]] | |||
==March 2013== | |||
Sample Mounting | |||
[[Image:CSsamplemount.png|frameless|600px|samplemount]] | |||
[[Image: | |||
[[Image:CS_2x_samplemount.png|frameless|600px|CS 2x samplemount]] | |||
[[Image:CS_2x_samplemountb.png|frameless|600px|CS 2x samplemountb]] | |||
[[Image: | [[Image:CS_2x_DustedSample_Mount_SpecFeScan.png|frameless|600px|CS_2x_DustedSample_Mount_SpecFeScan]] | ||
===Backgrounds=== | ===Backgrounds=== | ||
Latest revision as of 19:59, 28 July 2014
About
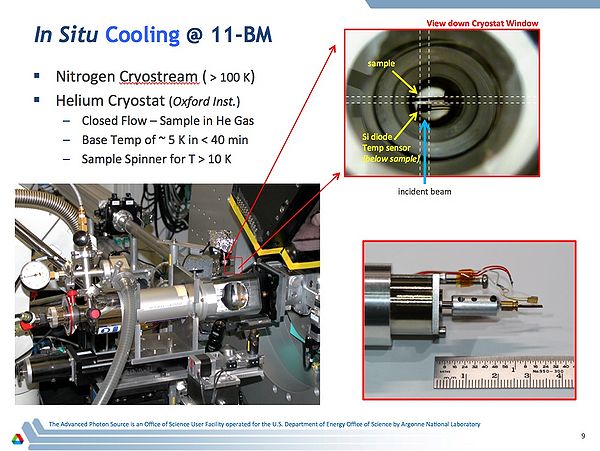
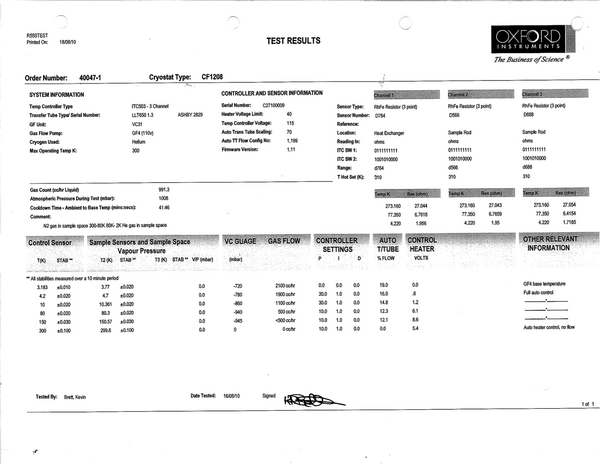
11-BM supports a Oxford closed flow Helium cryostat. The sample is in direct contact with the cold He exchange gas. This can be used to cool small diameter capillary samples from ambient temperatures down to ~ 10 K with an in-situ spinner (or 5 K with no spinning)
Helium Cryostat Image
User Instructions
Python Script to Log Cryostat Temperatures
- Copy the file "CStemplog.py" to your User GUP directory
- Check if your directory contains an old log file named "CryoStat_Templog.txt" - if Yes, rename the old log file.
- Open a Terminal window (right click on mouse)
- At the command line - navigate to your current User GUP directory
(example: cd ~Users/GUP25248)
- At the command line, type "EPDpython CStemplog.py" to start the log scrip
Changing Cryostat Samples
- Stop spinner motor (if using)
- Warm cryostat to > 280 K
- Close B-Hutch Shutter
- Set cryostat control Mode to "H&G Manual" , set all 3 values to 0.
- Turn OFF power for spinner motor controller - inside left blue cabinet, motor # 5. (if using)
- Turn OFF power to cryostat controller
- Disconnect cables on sample stick (Red = Sensor 2, Yellow = Auxiliary)
- Carefully pull sample mounting stick out of the cryostat. Take extra care of the fragile wires and sensors.
- Cover the cryostat opening
- Change samples on mounting stick - ensure new sample is the correct length.
- Carefully re-insert sample mounting stick inside cryostat.
- Check diode orientation with respect to the beam and sample
- Reconnect cables on sample stick (Red = Sensor 2, Yellow = Auxiliary)
- Turn ON power to cryostat controller
- Purge cryostat sample with Helium gas
1) turn on pump, open vacuum pump value 2) open gas cylinder, connect gas line 3) open cryostat value to sample space fully 4) close pump value, and slowly open gas value 5) bleed in Helium gas, but do NOT exceed 1 ATM pressure. 6) close gas valve, open vacuum pump repeat steps 4 -> 7 several times to purge sample space. 7) on last step, leave at under 1 ATM of Helium gas. 8) close gas, vacuum, and cryostat values 9) disconnect gas line, close gas cylinder 10) turn off pump
- Search Experimental Hutch
- Turn ON power for spinner motor controller (if using)
- Check sample alignment with the beam
Manuals
On the Internal 11BM Staff staff SVN repository here:
factory default PID info
ordering Liquid Helium
call Mary Berryman (FMS) on 2-3440 by 11 AM the day before to order Helium for next day delivery
normally order 100 L dewer
leave a message if no answer; give name, full cost code, badge number, delivery location (433)
'GE' Varnish
MARCH 2013 - Dusted Grease Kapton is much better than Varnish. Use of Varnish is NOT recommended (See below)
A preferred preparation method for 11-BM cryostat samples uses powder mixed with 'GE' Varnish to increase thermal transport between the sample capillary and helium exchange gas.
GE Varnish is a varnish and adhesive which possesses electrical and bonding properties that make it an excellent material for cryogenic temperatures. It can be ordered from Lakeshore under the name "VGE-7031"
It is stable over the temperature range 0 - 423 K (150 °C)
For more detail see: http://www.lakeshore.com/products/cryogenic-accessories/varnish/Pages/Overview.aspx
More Details
CuFeO2 example
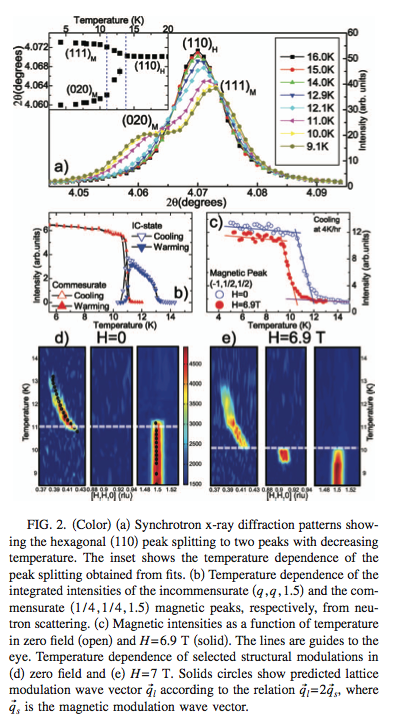
CuFeO2 is used at 11-BM as a low temperature "standard". This CuFeO2 sample has been examined by several beamlines (powder and single crystal) to established a clear and abrupt transition at ~ 12 K. Details are below. If you prepare this powder in the same manor as your new cryostat sample you should be able to observe the transition. If not, it may be a sign of poor heat transfer between your sealed capillary and the exchange gas - or a sign of significant beam heating. Of course - each sample is unique, but we have found this to be a useful check.
Phys. Rev. B 73, 220404(R) (2006) [4 pages] http://prb.aps.org/abstract/PRB/v73/i22/e220404
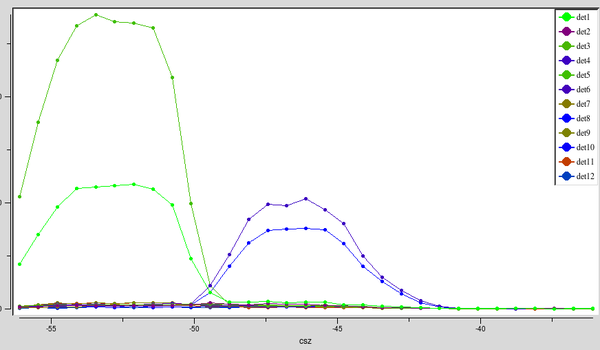
11-BM data; reported temp is the exchange gas temperature as measured by sensor #1 at the end of the sample stick.
March 2013
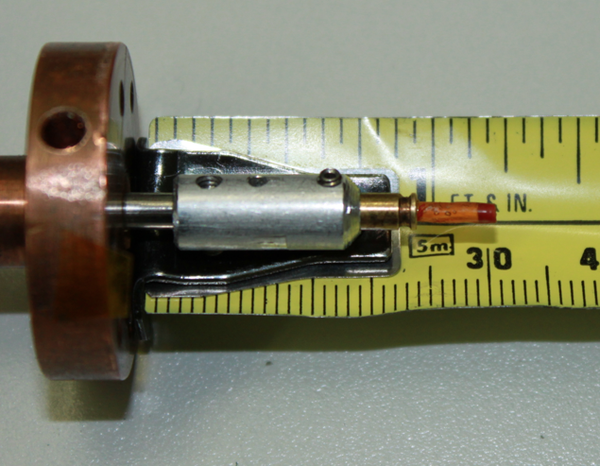
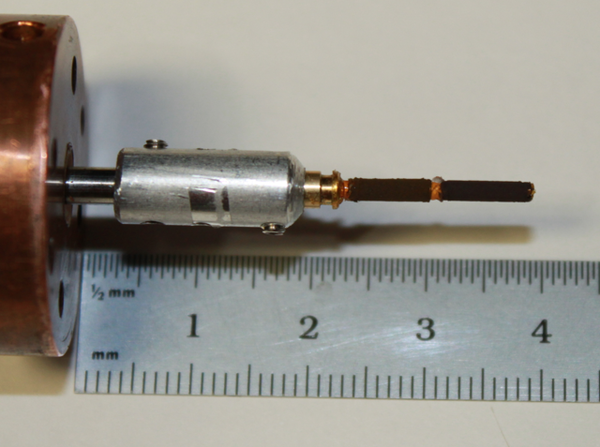
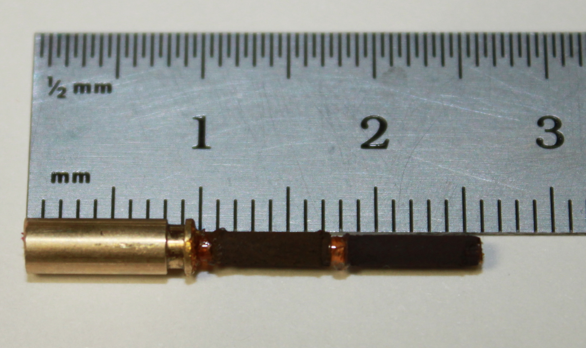
Sample Mounting
Backgrounds
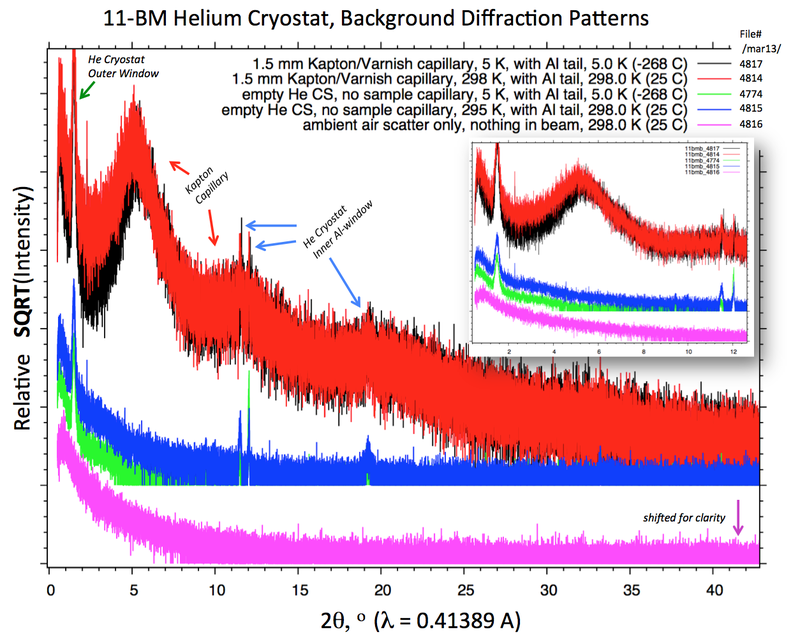
Background data for the 11-BM He cryostat are plotted below. Intensity is plotted as SQRT scale
Data were collected in March 2013.
Scan parameters for all data-sets are:
# Calibrated wavelength = 0.413891
# Start 2theta (deg) =    -17.0
# End 2theta (deg) =      50.0
# 2theta step (deg) =     0.001
# Time per step (sec) =   0.01
# Calibration file =      11bmb_4771.calib
File names/numbers are:
/mar13/11bmb_4817 = 1.5 mm Kapton/Varnish capillary, 5 K, with Al tail
/mar13/11bmb_4814 = 1.5 mm Kapton/Varnish capillary, 298 K, with Al tail
/mar13/11bmb_4774 = empty He CS, no sample capillary, 5 K, with Al tail
/mar13/11bmb_4815 = empty He CS, no sample capillary, 295 K, with Al tail
/mar13/11bmb_4816 = ambient air scatter only, nothing in beam
