Searching For Documents
General Notes
- Searches are limited to your permission level. If you don't have permission to view a document you don't have permission to see it in your search results.
- A high-level distinction is made between Documents and Drawings at many points in the interface. By default the system assumes you want to see documents. Ways to override these defaults will be demonstrated below and include among other options creating your own saved searches, targeted quick searches and home pages.
- There is a known issue with using the hyphen '-' character in full text searches. If you need to specify this character in a quick search, you are going to need to use a backslash as an escape character before it. For example, to search for 'sub-zero' you would need to specify 'sub\-zero' wherever you are specifying the text for your fulltext search.
- Matches, either fulltext or against metadata, are performed again without considering if a character is upper case or lower case. so Boron and boron return the same results.
- Anywhere you specify text to match against in a search, you can use either of two wildcards. The percent symbol '%'matches any string of characters, and the underscore symbol '_' matches any one character. So '%eter' matches meter and Multimeter, and 'car_on' matches Carbon and carton.
- Anywhere you specify text to match against in a search, if you specify some words with double quotes around the entire phrase the system will only return matches against that entire phrase as quote. If you search on title matching "Engineering Report" you would get 'Annual Engineering Report' but not the one for 'Special Report on Engineering'
- If you specify words to search against without double quotes around them the system will only return results which match against all the words you specified. For example, if you do a metadata search with Engineering Report as the text to compare against title, you will get results with titles including 'Annual Engineering Report' and 'Special Report on Engineering', but not 'Report Log' or 'Mechanical Engineering'.
Quick Search
Quick Search provides a simple way to find information based on common metadata criteria, such as Content ID, Title, and Author (Contributor). The Quick Search box is always available in the upper-right corner of the ICMS interface. To use Quick Search, enter one or more words in the box and select the Quick Search button.
Using Targeted Quick Searches
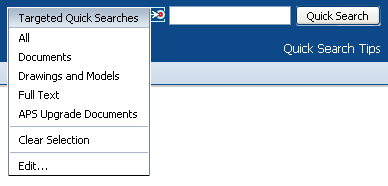
You can refine the Quick Search criteria by selecting the target icon to the left of the Search box. Then pick a criteria.
You will see that a number of Targeted Quick Searches are provided for you to use.
The way the system is set up, unless you select a Targeted Quick Search, your quick search will look for documents only (not CAD Models or Drawings). The quick search will try and match the string of text you have supplied against Author, Title and Name. If you want to search the text that is inside the documents as well you must specify the 'Full Text' Targeted Quick Search.
Building Your Own Targeted Quick Search
You are not restricted to the Targeted Quick Search (TQS) options that the ICMS staff have defined for you. If you wish to created your own type of TQS select the 'Edit' option from the TQS dropdown list.
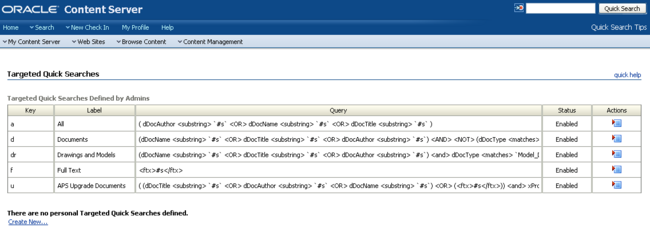
This brings you to the 'List Targeted Quick Search' page. From here you can view the queries that define the current TQS options. You can define and modify your own list of TQS types by means of the 'Create New' link.
Selecting 'Create New' brings you to a Targeted Quick Search builder form. It should look a lot like an Advanced Search form, with some more options. You'll need to give the quick search a Key and Label which are not currently being used by any of the quick searches that are on the 'List Targeted Quick Search' page. Aside from that you are allowed to build a query which matches any criteria you wish. The form allows you to build the TQS using either the Expanded Search Form or the Query Builder form. You are also given a way to select the Search Result Template of your choice, meaning you can display just those columns that are meaningful to you in the search results for your custom TQS.
One more tip on building Targeted Quick Searches: The character sequence #s is special. If you specify it in the 'Full Text Search' area or in any other area where you're comparing it to a field, the system will compare it against the words that were entered into the TQS search box. An example should clarify this. Say you created a new TQS, and you specified:
- Full-Text Search: #s
- Contributor: dcaulton
- Comments/Keywords: #s
When this quick search is performed with the word 'Ultraviolet' it will return all documents where dcaulton is the contributor and the word 'Ultraviolet' (in any combination of upper and lower case letters) appears either in the text inside the document or in the Comments/Keywords metadata for that document
You will notice that on the 'List Targeted Quick Searches page', the Query as specified in the table has field names like dDocName and xProject. This is one of the few places in the interface where the actual names of the fields are they exist in the database are specified. It is likely to cause confusion for most users because there is nowhere where you can find out that dDocTitle is the same thing as 'Title' on all the other pages. Please bear in mind that this is a screen that is intended for intermediate to expert users and that it is an unavoidable consequence of offering this extended 'Build your own TQS' functionality.
Home Page Search
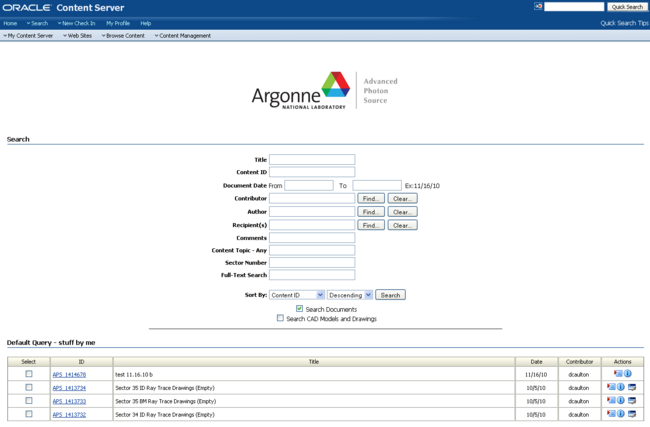
After logging in to ICMS the first page you see is your Home Page. You can also access this through the top-level Home link in your page navigation area.
This page is divided into a top and bottom half. At the top is a very simple Search profile. If you have configured a Default Search in your profile those search results will be displayed in the bottom part of your Home Page. The process of configuring your Default Search is described later in this same document.
Metadata Search Profiles
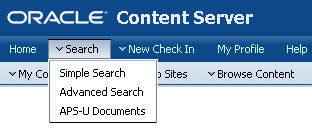
The easiest way to perform ad hoc searches on the ICMS is to use one of the Search Profiles which have been provided. These can be accessed via the top level dropdown menu titled 'Search'.
Be aware that as you do a regular metadata search (not a query builder metadata search), if you have specified multiple fields to match against, all of those conditions must be met in order for a result to be returned. In other words, all your conditions are joined by ANDs in the underlying query.
Simple Search
This provides about 20 of the most commonly used metadata items.
Advanced Search
Advanced search allows the user to search on all but a few administrative-only fields.
APS-U Documents
This search limits the results to documents which are flagged as related to the APS Upgrade. These documents were flagged by the system as they were checked in via the 'New Check In for APS U documents'
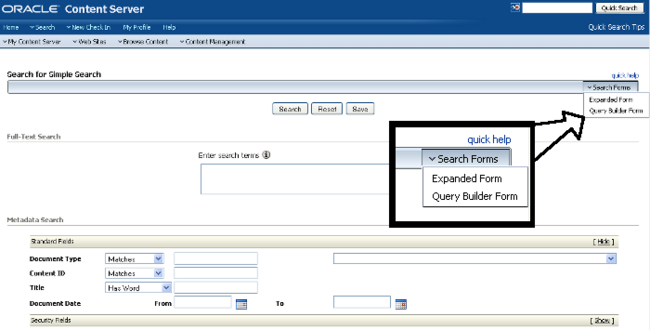
Two search forms available in Metadata Search Profiles: Extended Form and Query Builder
From any of the three metadata search profiles you are allowed to specify if you want to use the Extended Form, or the Query Builder interface. This is done by means of a dropdown list on the right edge of the gray title bar of the search form - it is labeled 'Search Forms'.
The extended form is another name for the regular metadata search profile form. It has one line for each of the search parameters which are enabled for that profile. The Query Form is something different. It allows you to specify any of the search parameters enabled for that profile as well, but it allows you much more control over how the actual database query looks.
Query Builder interface gives the Highest Level of Control
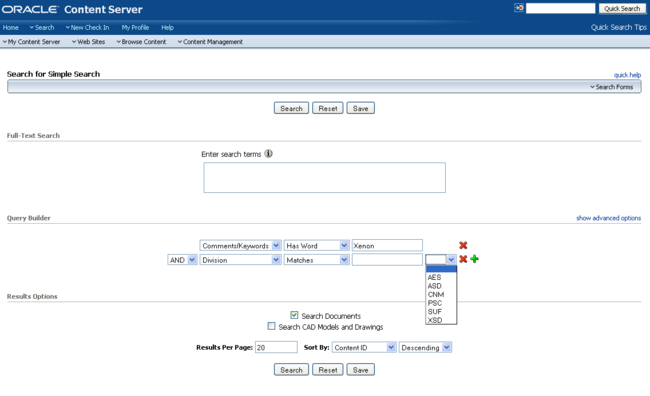
If you select Query Builder you will see the middle part of the search form with the header labeled 'Metadata Search' will be replaced by a Query Builder area.
The example above has been partially completed to illustrate the features of the Query Builder. You will start with one uncompleted row containing only a drop down list of metadata field names. As you select a field name a couple more fields are displayed. These are:
- a comparison operator giving you options like Matches, Substring, begins with and ends with.
- a value field where you can key in the value you want to compare to. Alternately, you might have blank value field followed by a drop down list of values. For that case you can either specify a value from the dropdown list (which automatically populates the blank text box for value, or you can key in your own value in the text box.
- a red 'X' and green '+' at the end of the row. Selecting the red 'X' deletes this row, and the green '+' adds another row.
For all rows after the first one there is an additional field at the beginning of the row. It is a dropdown value giving you the option of 'AND'/'OR'. This allows you to apply conditional logic in the query you are building. Used in this manner it only allows you to apply these kinds of rules on the rows as you see them. For example your SQL will end up looking like WHERE (A=B OR C=D AND E=F). You need to use the advanced query builder to express more complex, nested conditions like WHERE ((A=B AND C=D) OR (E=F AND (G=H OR J=K)))
Advanced Options for Query Builder gives you full control over the Query Builder
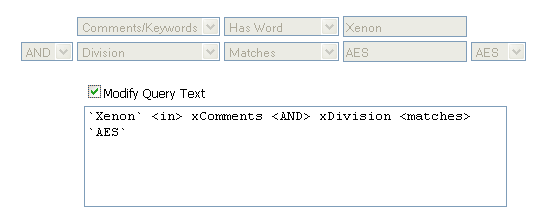
For those comfortable with SQL there is one more level of control possible using the Query Builder interface. If you select the 'show advanced options' link at the right of the Query Builder section and then check the 'Modify Query Text' box, you will be editing the exact query that runs against the Oracle database.
On this page as on the 'List Targeted Quick Searches page', note that the Query as specified in the text area has field names like dDocName and xProject. This is one of the few places in the interface where the actual names of the fields are they exist in the database are specified. If you wish to determine what database-field-name that 'Comments/Keywords' maps to for example, this is a good place to do that by specifying 'Comments/Keywords' in the dropdown in Query Builder mode, then switching over to the Advanced Options mode and noting the changes in the generated SQL. It should be clear that this is a screen that is intended for expert users. If this screen is giving you problems please contact the ICMS management team and we will do our best to help (and improve this documentation).
Full-text Search
A Full-text Search means a search that is based on the contents of the file that was checked in. The other type of search is a metadata search a search based on the fields specified on the check in form as the document was added to the system. These two types of search are not mutually exclusive it may help to know that they are different and work differently with the system.
As documents are checked in they are processed into a web-viewable version (a PDF). At the same time the system extracts all the text from the document and adds it to an index - which is a cross reference between words and phrases and the documents where they are found. This index is done without respect to case, so a fulltext search for Yttrium would yield the same results as a fulltext search for yTTrIuM, or any other combination of upper and lower case. Spaces may or not matter depending on the circumstances, but dashes, underscores and other characters do matter, so be heedful as you assemble your criteria.
There are several ways of performing a Full-text search:
- From any of the Metadata Search Profiles, specify text in the box near the top of the page labeled Full-Text Search. This can be done in either the Query Builder or the standard 'Expanded Form' page format.
- Do a Quick Search, selecting a Quick Search Type of FullText, or any custom type you might have made yourself which includes a Full-Text search.
Managing Search Results
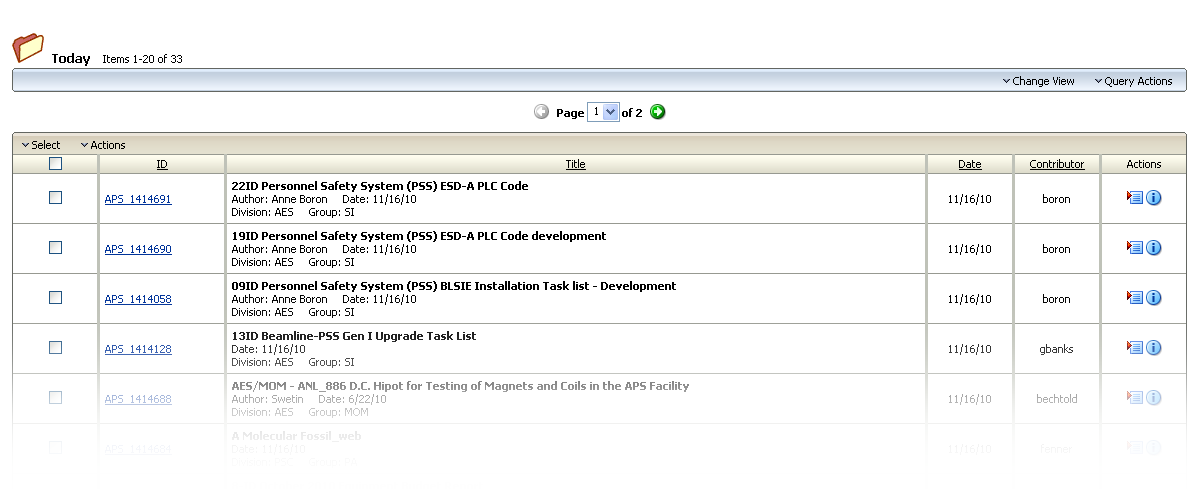
After you have specified your search criteria and performed a search, you will see a Search Results screen with the first page of documents which match your criteria. From this point you have the ability to view these items, change the way the items are listed (by setting your Search Results View) or further narrow your search without needing to specify your search criteria all over again.
Changing Search Results Views to display additional metadata
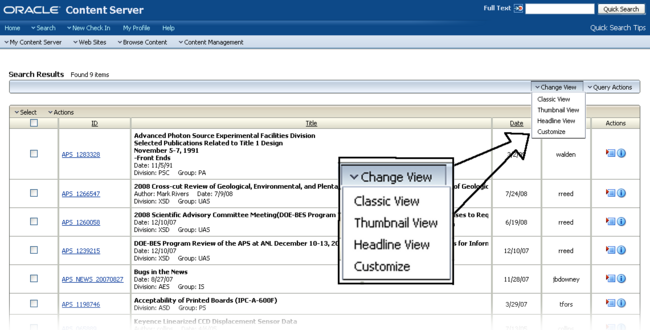
On the Search Results page, there is a dropdown menu on the silver header near the top of the page. It offers you the option of displaying the results in any Search Results View which is provided with the system, or which you have developed yourself.
The three views provided are the Classic, thumbnail and headline views. Selecting 'Customize' will direct you to a page where you can build and name a view using any of the fields available.
Customizing Search Results Views
In the Change View dropdown on Search Results View is the Customize option. If you select that option, you will be directed to the main screen for Customized Search Results Views.
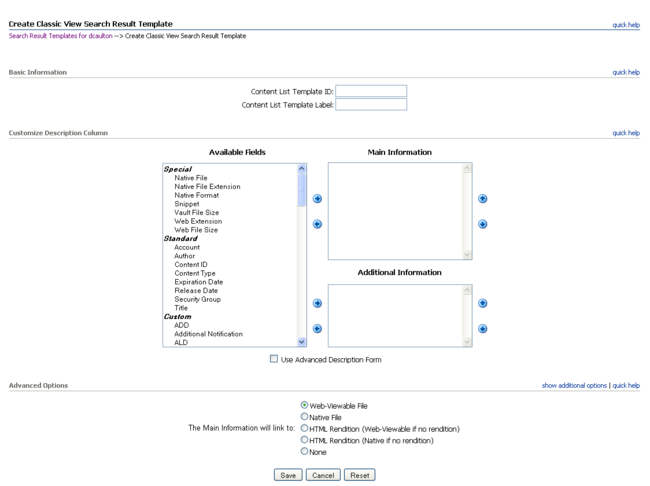
On this page you see the three main default views for the system: Classic, Thumbnail and Headline. Selecting the green '+' next to any of those brings you to a screen where you can build and name your own view. In the example below I select the + next to the Classic View.
From this screen I can select the fields of importance to me. When I finish I save it with a new name. That name will now appear as a subcategory of Custom Views on the Change View dropdown from the Search Results page. The ID and Label fields should be a unique name so that it is not confused with the default Custom View.
Saving Searches with My Saved Queries
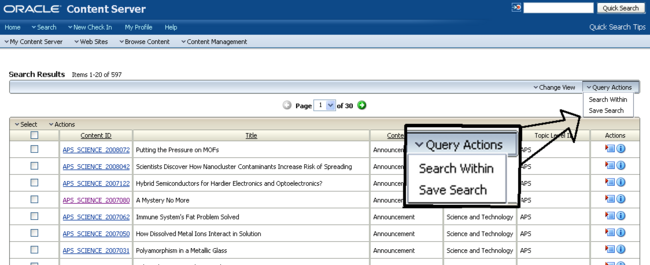
Saving searches is performed from the Search Results page.
Selecting Save Search from this dropdown will bring up a dialog box which prompts you for a Title. After saving the search with a name, it will appear in your list at My Content Server -> My Saved Queries.
If you wish to edit this query in the future, go to My Content Server -> My Saved Queries and select Edit Saved Queries
Using Search Within
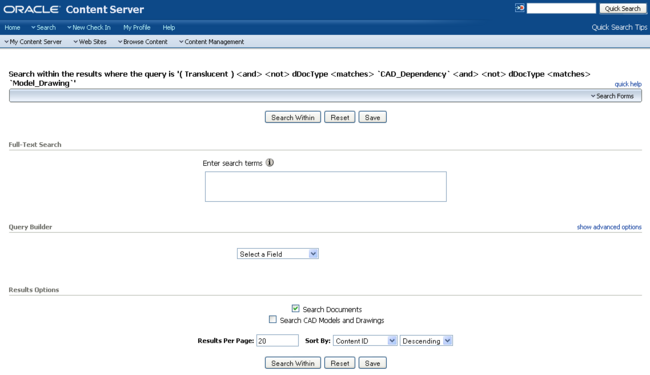
From the Query Actions dropdown on the Search Results page, there is an option named Search Within. Selecting this will bring up the Search Within page:
This preserves the parameters of the search as it was specified but allows you to further refine the search using Full Text Search, an Expanded Search Form or the Query Builder interface as you wish. The Search Forms dropdown is used to specify either the Expanded Form or the Query Builder form.
The Search Within will perform your new search, and the Save button will allow you to save the search.
Setting up a default search on your home page via My Profile
If you select the My Profile link at the top of any page you will be directed to your Profile Page.
On this page select the square button at the bottom of the page labeled 'Portal Design for <your username>'
On the Portal Design page you will see a list of your saved queries with a button above them labeled 'Edit Saved Queries'. Press this button.
You will now be on the page listing all of your Saved Queries. Each one will have its own row, and there will be an icon in the rightmost column under the heading of Actions. If you click on this icon it will give you a dropdown list of options. One of these options is 'Set As Default'. This is the manner by which you can create a default query. After selecting one as a default, verify that the 'Show Default Query' box is checked, then press the Update button at the bottom of the page. The results of your custom query will now show at the bottom of your Home Page in ICMS.
Getting Your Search Results into a Spreadsheet
If you have a need to get your search results into a Microsoft Excel spreadsheet, you currently have two options.
- On the search results page, use your mouse to highlight all the rows you are interested in. Copy these rows to your clipboard. You can use Edit-Copy through your web browsers menu, or Control-C, Apple/Command-C if you use a PC/Linux or Mac respectively. Then open up Excel and paste the contents of the clipboard into your document, either using Edit-Paste on the menu for Excel, or by using Control-V, Apple/Command-V if you are using a PC/Linux or Mac respectively. After you have completed these steps you will need to clean up the spreadsheet, as some things you probably didn't want will get pasted into your document as well.
- If your result set is too large to clean up or you have other reasons for not wanting to use the cut-and-paste method, contact the ICMS administration staff and they will prepare a document for you based on your search.
Library Folders
The top level navigation for ICMS includes a menu item labeled Browse Content. There are two menu options under Browse Content, the one of interest here is Library Folders
You can think of Library Folders as saved searches which are available to everyone in ICMS. They have one more important feature -Library Folders can hold content items as well as other Library Folders. This allows ICMS users and administrators one method for organizing their data hierarchically without much concern for the way the metadata on each content item looks. As long as they can craft a query which would gather all the items they can assemble them into a set of Library Folders.
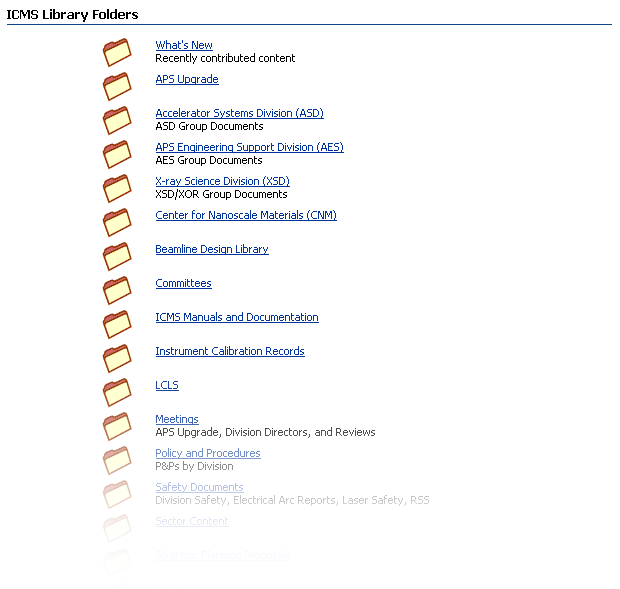
At the top level, the library folders for ICMS are displayed as a list on a single page.
As the user selects a folder, then a child of that folder, etc. she will eventually get to a point where the folder contains only documents. At this point it will look like a Search Result page, except that the description above the silver header bar for the page will indicate that these documents are grouped in a Library Folder.
